Most web developers are familiar with this term , but let me make some clarification for you newbies out there, virtual host refers to the practice of running more than one website such as gigzweb.com and gigzweb2.com on the same physical machine. virtual Host can be either IP-Based or Named -Based . For IP- Based virtual host you have different IP address for every website while the Named- Based virtual host just en-tells that you have multiple names running on each IP address.
The benefits of enabling virtual hosting in a local environment are enormous;
1.It helps you testing the behaviour of each site you develop
2.It comes in very handy when your working with PHP frame works like codeigniter ,CakePHP, Zend frame work and the rest which requires a base URL configuration, since almost all the PHP frame works out there use the MVC architecture of programming it becomes very necessary.
3 Most importantly it enables you to work on different projects at the same i.e having multiple projects in your WWW directory.
4.virtual host generally makes URLs cleaner - localhost/gigzweb.com vs gigzweb.com
With the release of WampServer 3.0.6 the problems which were involved in enabling virtual host in Apache was handled. Previous versions of WampServer required editing and modification of the Apache config files to enable virtual host,I personally had to uninstall my Wamp 2.5 three times while trying to enable Virtual Host because of the changes I made to my config files , previous versions also required writing rules for IP address in your windows host files which you shouldn't try unless you know what your doing.
follow these steps to configure a virtual Host in WampServer 3.0.6;
1.Download and install the latest version of WampServer which at the time I was writing this post was 3.0.6. from the WampServer official page .
NOTE Wamp 3.0.6 was developed using visual studio 2015, so to be able to run the programme you need to download and install visual studio redistributable 2015 from the official Microsoft site if you have any problem while installing the package try running a complete windows update.
2.launch the application .check to see if the green icon
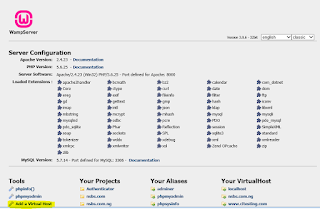
3. visit "localhost " in your browser and you should see the WampServer default homepage
4.clik on add "a virtual host" a the bottom of the page.
6. In the next page add the name of your virtual host you wish to create, for this tutorial I will be creating "www.mynewsite.com" as my virtual Host name .Next add the directory to the folder which contains your site files this should be a sub directory under your C:\wamp\www directory which is your main http directory. the directory should have a forward slash instead of a backward slash example; "C:/wamp/www/www.mymynewsite.com
Note:the virtual Host name does no have o be the same with the site directory.
5. click on "start creation of virtual host".
7. Finally go to www.mynewsite.com on your browser to view your newly created virtual host.

.


0 comments:
Post a Comment